How to create a MySQL database Using XAMPP
In XAMPP we create a MySQL database using phpMyadmin.
What is phpMyadmin?
phpMyAdmin is a free, open-source, web-based tool that provides a graphical user interface (GUI) for managing MySQL and MariaDB databases. It’s written in PHP and allows users to perform various database management tasks, including creating and deleting databases, creating and managing tables, executing SQL queries, importing and exporting data, and managing user accounts and permissions.
With phpMyAdmin, users can interact with databases through a web interface without having to use a command-line interface. This makes it easier for users to manage their databases and perform database-related tasks. phpMyAdmin is widely used by web developers and system administrators for managing MySQL and MariaDB databases and is available for multiple operating systems, including Windows, macOS, and Linux.
You can create a database using XAMPP by following these steps:
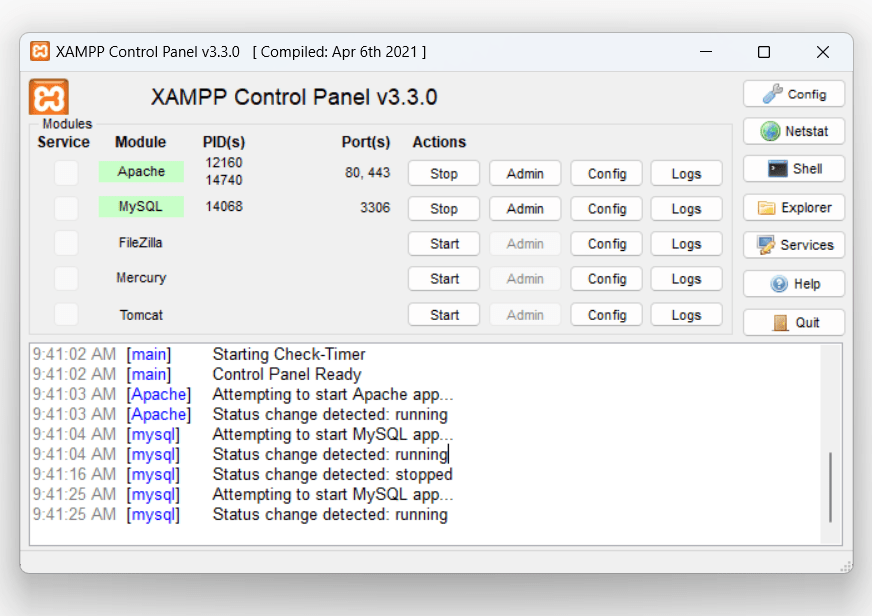
1.Open the XAMPP control panel and start the Apache and MySQL modules.
2.Open a web browser and go to http://localhost/phpmyadmin/. This will open phpMyAdmin, a web-based application for managing MySQL databases.
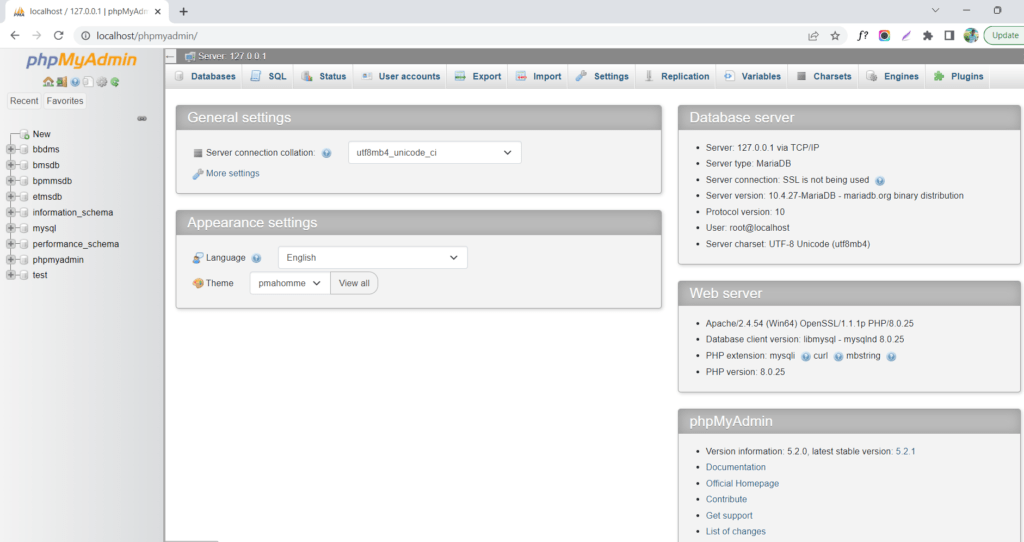
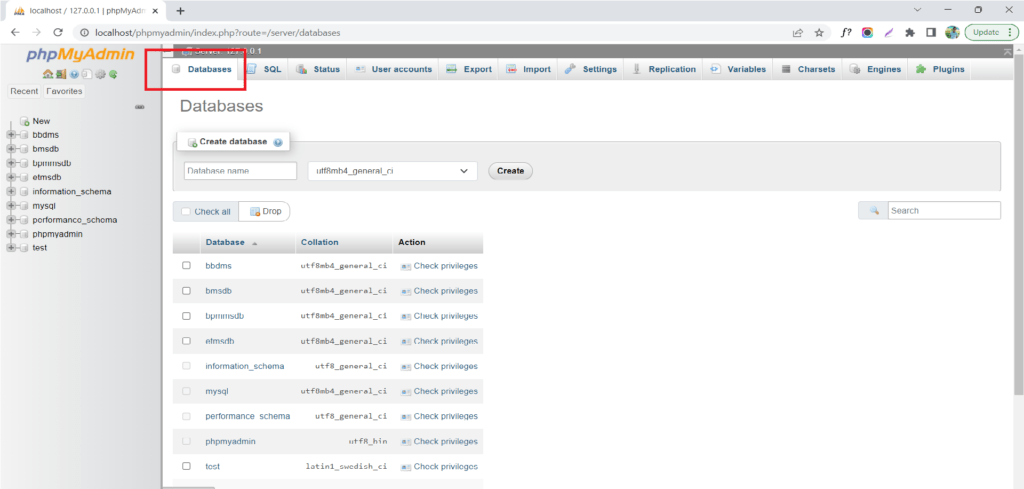
3. On the phpMyAdmin page, click on the “Databases” tab at the top.
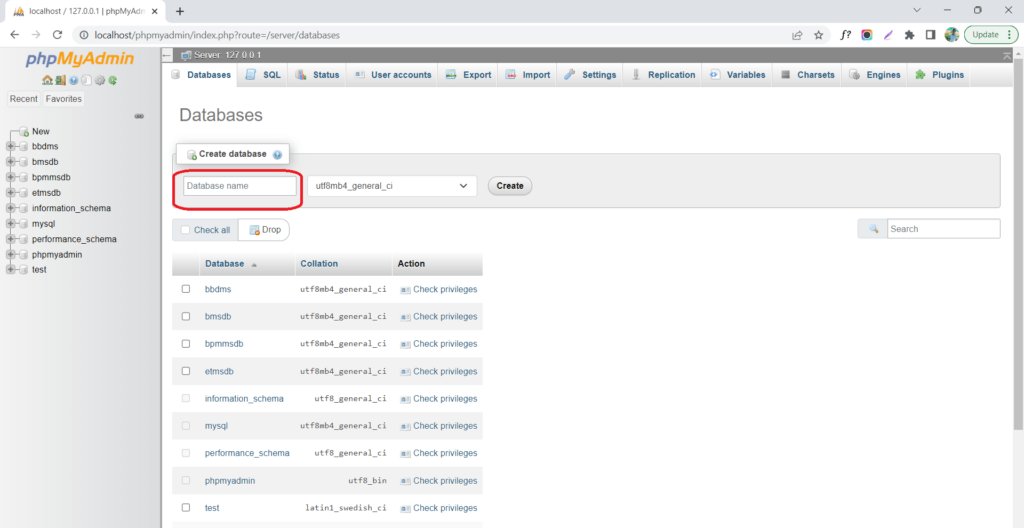
4. In the “Create database” field, enter a name for your new database and click the “Create” button. This will create a new database with the given name.
5.You can now create tables and other database objects by clicking on the name of the new database in the left sidebar and then clicking on the “Create table” or “Import” tab.

That’s it! You have successfully created a new database using XAMPP. You can use this database for your web applications and test them locally on your computer.

