Stock Prediction using Python machine Learning (ML)
“Stock Prediction System using Python Machine Learning (ML)” is a web-based application that integrates machine learning with the Django framework. This project is designed to bridge gap by applying machine learning techniques to historical stock market data. The system leverages Python libraries like scikit-learn, NumPy, and Pandas, integrated with Django for web development, to provide predictions in a user-friendly interface. It allows users to select a stock ticker, specify a prediction horizon, and obtain results in both numeric and graphical formats, Download Stock Prediction using Python and Machine Learning (ML) project with source code, MySQL database, detailed report, and PPT. Stock Prediction using Python machine Learning (ML) project for Students and Stock Price Prediction using Machine Learning in Python Final year BCA, MCA, B.Tech students project.
🛠️ Tech Stack Used
🌐 Frontend / Web Interface:
- Django (Python Web Framework) – Used to create the web interface for user input, displaying predictions, and managing data
- HTML5, CSS3, JavaScript – For rendering and styling web pages
- Bootstrap (optional) – For responsive UI components
- Django Templates – For dynamic web page rendering
🧠 Machine Learning / Backend Logic:
- scikit-learn – Machine Learning library used to implement algorithms like Logistic Regression, Decision Tree, Random Forest, KNN
- NumPy→ For numerical operations and matrix manipulation
- Pandas → For handling and preprocessing datasets
- joblib → To save and load the trained machine learning model
- matplotlib → A Python library for creating static, animated, and interactive data visualizations.
- yfinance → A Python library to fetch real-time and historical stock market data from Yahoo Finance.
🗃️ Database:
- SQLite – Lightweight relational database used to store user data and predictions
- Django ORM (Object Relational Mapper) – Handles interaction between Django models and the SQLite database
⚙️ Tools & Environment:
- Python 3.x – Core programming language used
- PyCharm – IDE for development
- Virtualenv / pip – For managing dependencies
✅ Key Features
Details of Admin and User Management
Admin Management
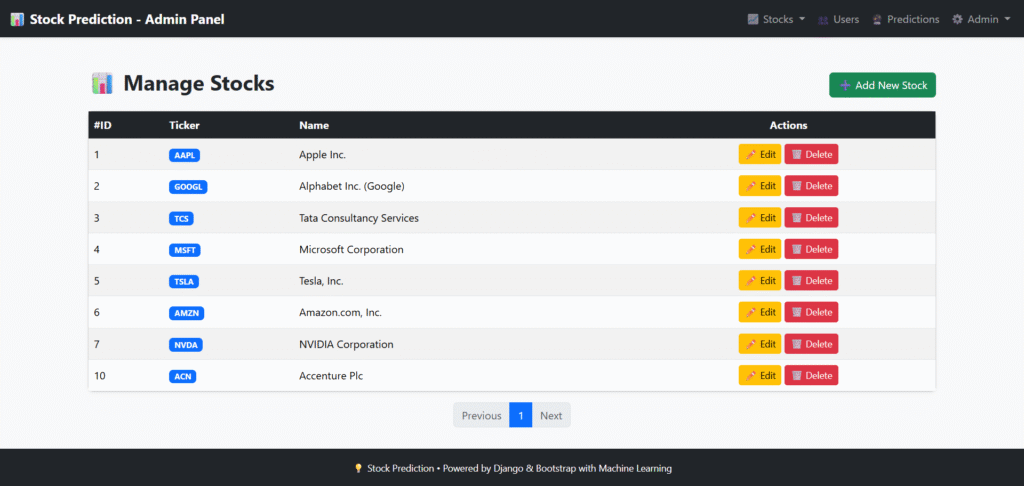
- Stock Records Management
- Admins can add new stock tickers and company names into the system.
- They can edit or update stock details when required.
- Admins also have the ability to delete outdated or irrelevant stock records.
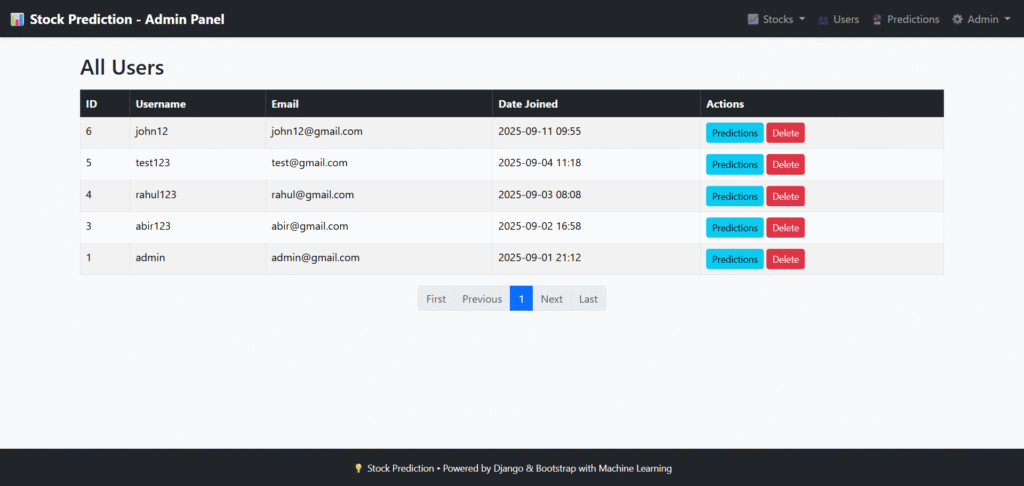
- User Management
- Admins can view a list of all registered users.
- They can monitor user activity, including login details and prediction history.
- Admins are able to remove inactive or suspicious user accounts.
- Prediction Oversight
- Admins can access all user predictions.
- They can view, analyze, or delete predictions when needed.
- Helps maintain transparency and control over the system’s use.
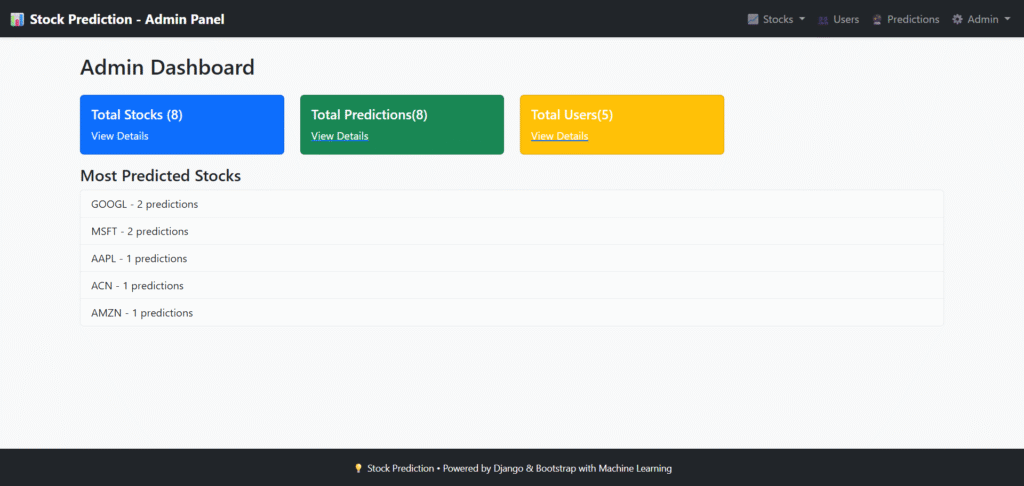
- Dashboard Insights
- Admins can see total stocks, total users, and total predictions in real time.
- A summary of the most predicted stocks is displayed for quick insights.
User Management
- User Registration & Authentication
- Users can create an account with email and password.
- Secure login ensures only authorized access.
- Profile Management
- Users can update their personal details.
- Change password option is available for security.
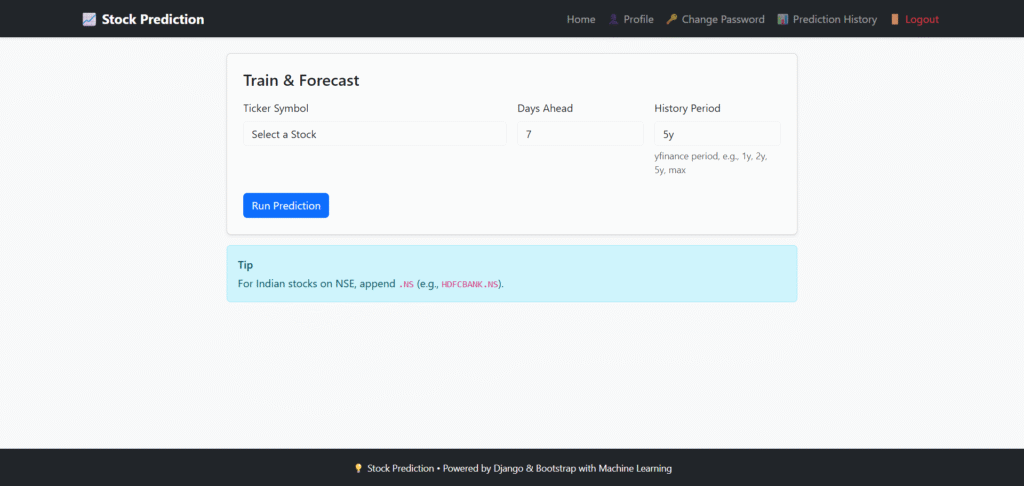
- Stock Prediction
- Users can select a stock ticker, choose a prediction horizon, and view forecast results.
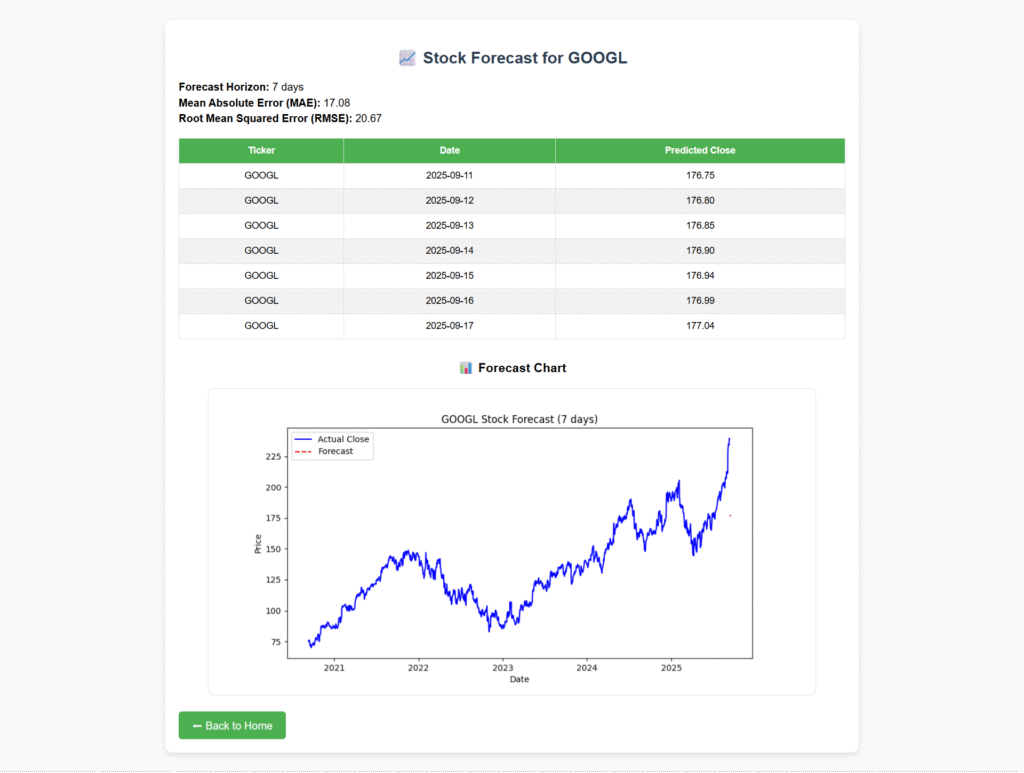
- Predictions are shown with numeric data and charts for better understanding.
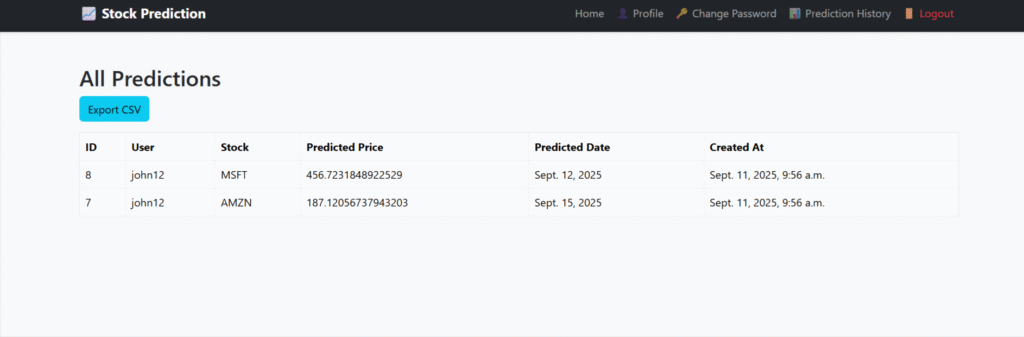
- Prediction History
- Every prediction is stored for future reference.
- Users can revisit their past predictions anytime.
- User-Friendly Dashboard
- A clean interface provides easy access to stock prediction tools.
- Users can quickly navigate between profile, predictions, and history.
Stock Prediction System: Output Screens
Home Page
Prediction Chart
User Prediction History
Admin Dashboard
Manage Stocks
Register Users
Prediction History

How to run the Stock Price Prediction System Python ML Project
1. Download the zip file
2. Extract the file, copy stockprediction, the folder and paste it on the desktop
3. Open PyCharm and import the project into PyCharm
4. Install Six libraries (if not installed)
pip install joblib
pip install numpy
pip install scikit-learn
pip install pandas
pip install yfinance
pip install matplotlib
5. Run the Project using the following command
python manage.py runserver
Now, click the URL http://127.0.0.1:800,0 and the Project will run