Bus Pass System Using Django Python MySQL
Bus Pass Management system is a web-based technology that will manage the records of pass which is issue by administrative and also help to provide online bus pass to people who need to travel daily. Bus Pass Management System is helpful to bus administrative by reducing the paperwork, time consumption and makes a process of getting bus pass as a simple and fast.
Bus Pass Management system we use Python using Django framework and MySQL database. This is the project which keeps records of the pass which is issue by administrative. Bus Pass Management system has one module i.e. admin.
Project Requirements
| Project Name | Bus Pass System Project in Python Django |
|---|---|
| Language Used | Python |
| Framework Used | Django |
| Database | MySQL |
| User Interface Design | HTML, AJAX,JQUERY,JAVASCRIPT |
| Web Browser | Mozilla, Google Chrome, IE8, OPERA |
| IDE | PyCharm |
Project Modules
Bus Pass Management system we use Python using Django framework and MySQL database. This is the project that keeps records of the pass which is issued by the administrative. Bus Pass Management system has one module i.e. admin.
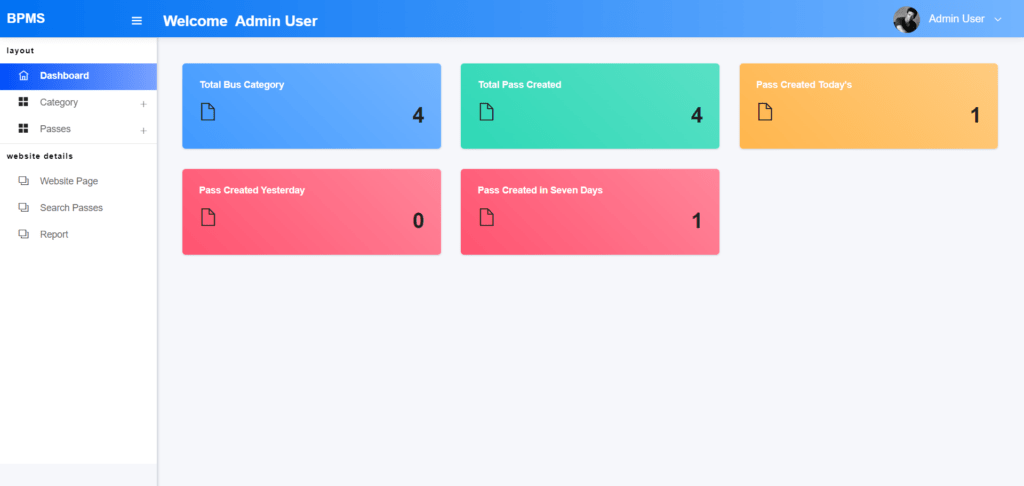
Dashboard: In this sections, the admin can briefly view the total number of categories and how many pass will be generated in one day, yesterday and last seven days
Category: In this section, admin can manage the category (add/update/delete).
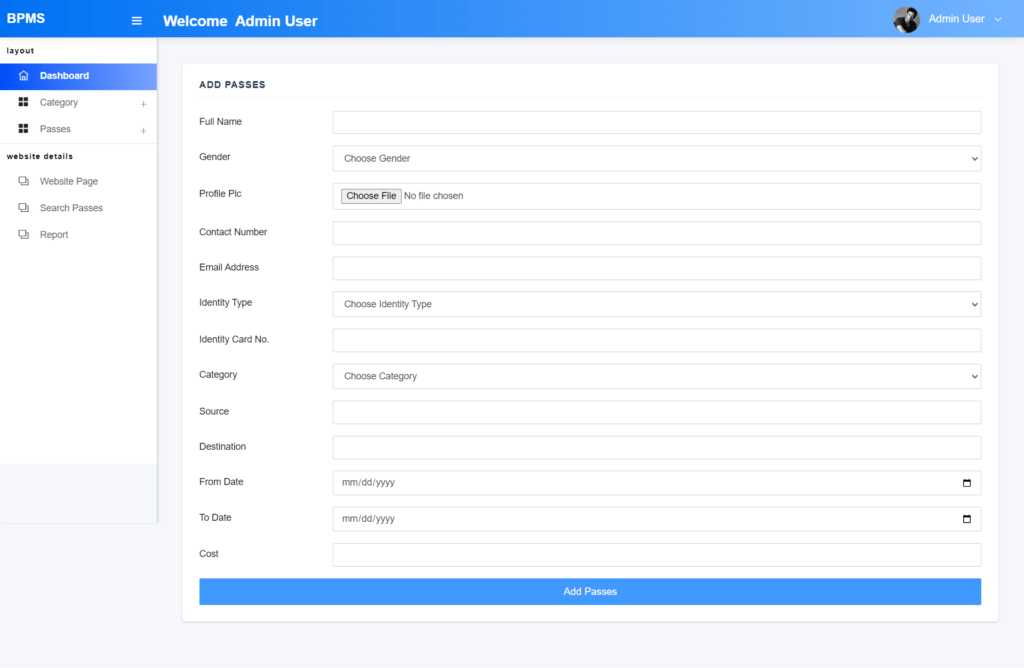
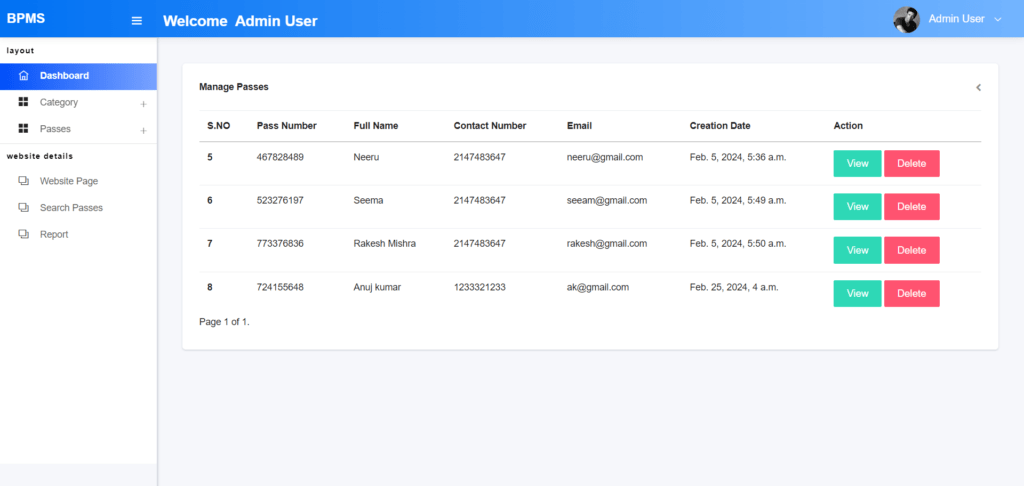
Passes: In this section, admin can manage passes (add/update/take print passes).
Website Pages: In this section, admin can update About Us pages.
Reports: In this section admin can generate pass reports between two dates.
Search Passes: In this section, admin can search for a particular pass-by-pass number.
Admin can also update his profile, change the password, and recover the password.
Project Screen Shots
Home Page

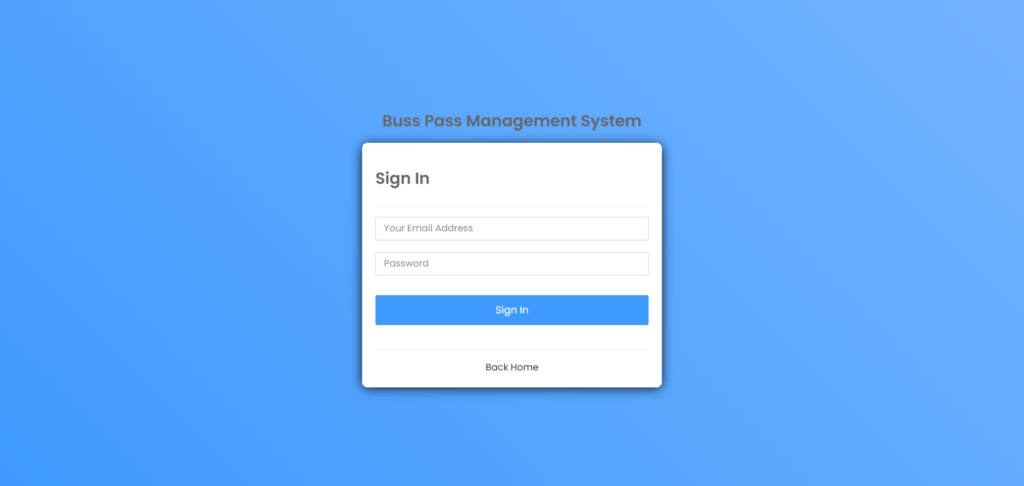
Admin Login
Dashboard
Add Pass
Manage Pass
How to run the Bus Pass System Django Python
1. Download the zip file
2. Extract the file, copy CVMS folder, and paste it on the desktop
3. Open MySQL Create a database bpmspythondb then import the SQL File available in the MySQL File Folder (For MySQL we used XAMPP server)
4. Open PyCharm and click on the terminal
5. Navigate the project folder using the cd command
cd project_path
For ex: cd C:\Users\ANUJ\OneDrive\Desktop\bpms
6. Now Navigate to the Company Visitor Management System folder
cd buspass
7. Run the Project using the following command
python manage.py runserver
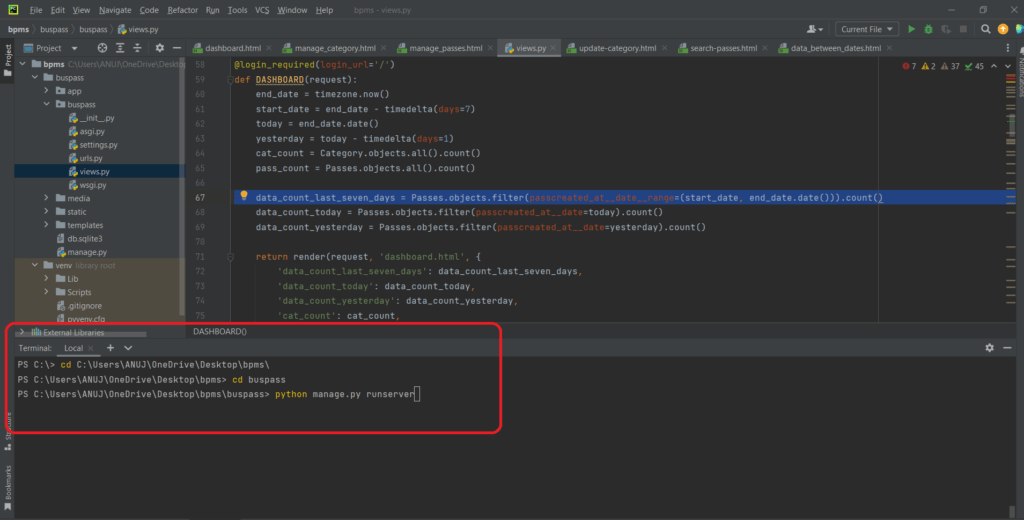
Now click the URL http://127.0.0.1:8000 and the Project will Run


